QuickOPC User's Guide and Reference
Binding Collection Editor
The binding collection editor allows adding, removing, and modifying bindings. It is usually invoked to work on bindings for a specified control, but it can also be used to work on bindings of all controls in a container (a form in Windows Form, or a window in WPF, typically). It is basically an editor for Binding Bags.
To show the binding collection editor for a specific control, you can either:
Note: If you do not see any of the above commands, the likely reason is that you have not placed the BindingExtender component on the form.
To show the binding collection editor for all controls on a Windows form, select the BindingExtender component, and in the Properties window, find the ComposedBindingBag property. Select this property, and then click the small “…” button on the right side.
When invoked, the binding collection editor looks similar to this:
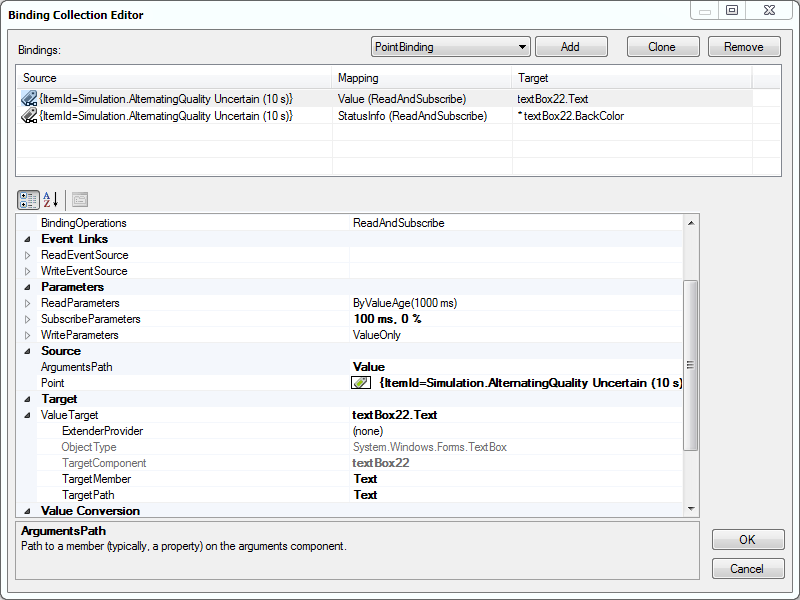
The “Bindings” list displays all bindings in the collection, and the most important information about them (the source, the binding operations, and the target of the binding). Selecting any row in the “Bindings” list displays the properties of the selected binding in the “Binding properties” property grid. You can then view and modify the detailed properties of the binding in the property grid.
You can also view and modify the design-time properties of each binding: The name (Name) used in code to identify the object, whether a member variable will be generated for the component (GenerateMember), and the visibility level of the object (Modifiers).
There are also following commands available in the binding collection editor:
Add:
Creates a new binding of the selected type, and adds it to the binding collection. Before pressing Add, you need to select the desired type of binding in the drop-down list left to the Add button.
The newly created binding gets some of its parameters from the templates defined on the binder or the connectivity component. If you create many similar bindings (such as always referring to the same OPC Server), you can save yourself lots of work by pre-filling the template with parameters that you commonly use.
Clone:
Create a duplicate of the selected binding (or bindings). This can be useful when you have made the main binding on the control, usually with ArgumentsPath of Value, and you want to extend it further, e.g. by adding a tooltip, or change the background color. In this case you need to bind to the same source and using the same parameters, and you will be changing just the arguments path and the binding target.
Remove:
Remove the selected binding (or bindings).
OK:
Confirms the changes made to the bindings in the dialog, and closes the dialog.
Cancel:
Dismisses any changes made to the bindings in the dialog, and closes the dialog.
All changes that you make to the bindings in the binding collection editor are temporary, until you press OK. You can revert to the original state by pressing Cancel at any moment.
Note: Emptying the ValueTarget.TargetComponent of any binding will effectively remove the binding from the binding collection when the dialog changes are confirmed. This is because bindings must always be associated with their target.